Guide · Saree
Saree photoshoot guide
Turn one flat photo of your saree into professional model photos, ready for WhatsApp, your catalogue and marketplace listings.
This page is the how-to. For what AI saree photography produces and what it costs, start there and come back here to upload.
Photographing a whole rack rather than one saree? What a catalogue photoshoot costs per design works the sum for 50 designs and sets it against a studio quote.
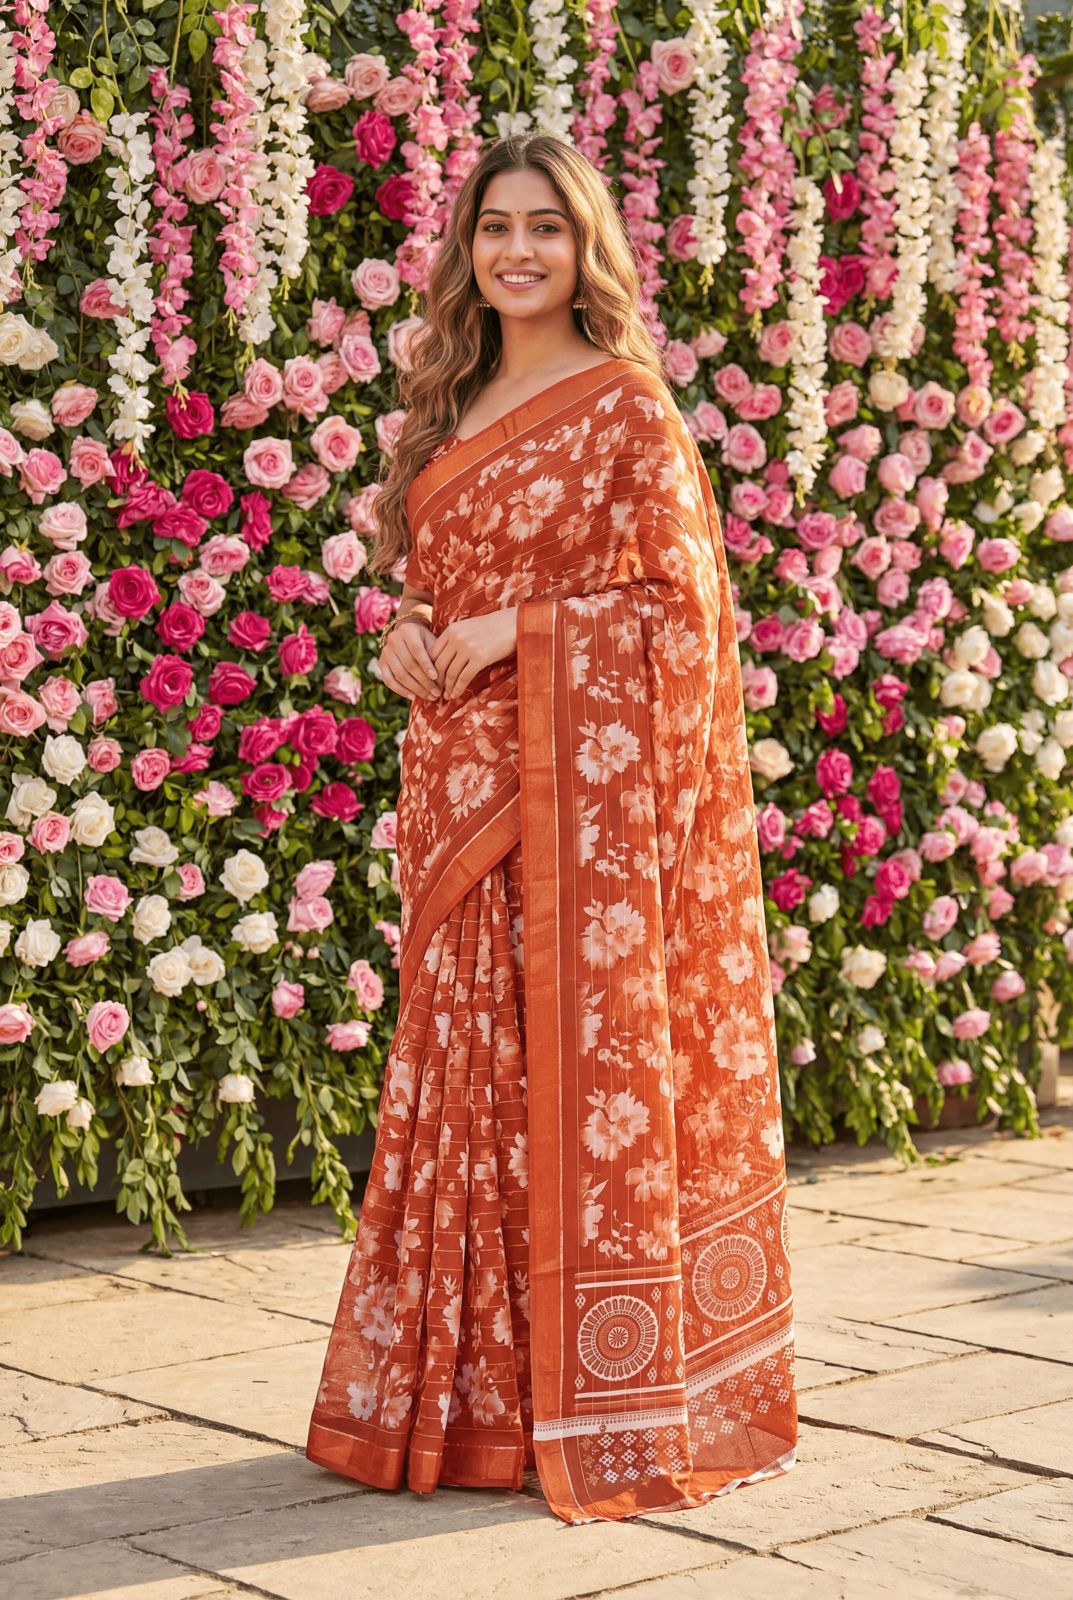
What you need
- One clear photo of the full saree, laid flat or hanging, cropped so only the fabric is in the photo
- Only if a part has its own design: a photo of just that part (blouse piece, pallu, border)
Choose “Saree”
On the dashboard, under Generate For, pick Saree.
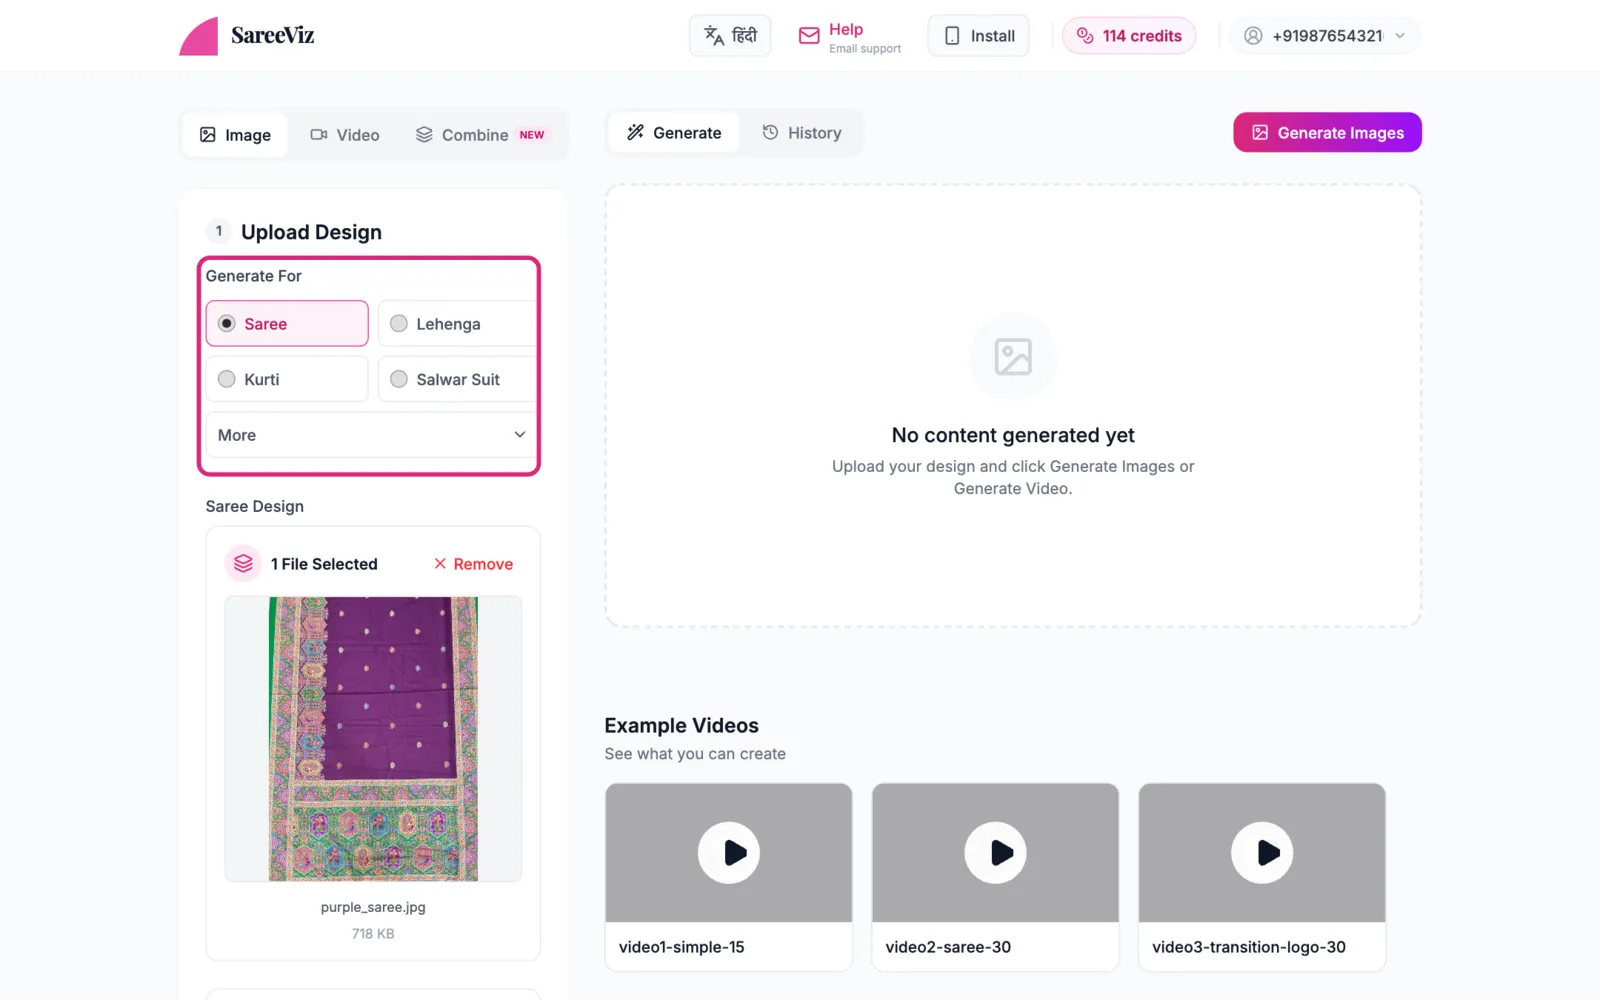
Upload your saree photo
In Saree Design, add one photo of the full saree. This photo decides the fabric, colours and border in every output, so use your original product photo rather than an earlier AI photo.
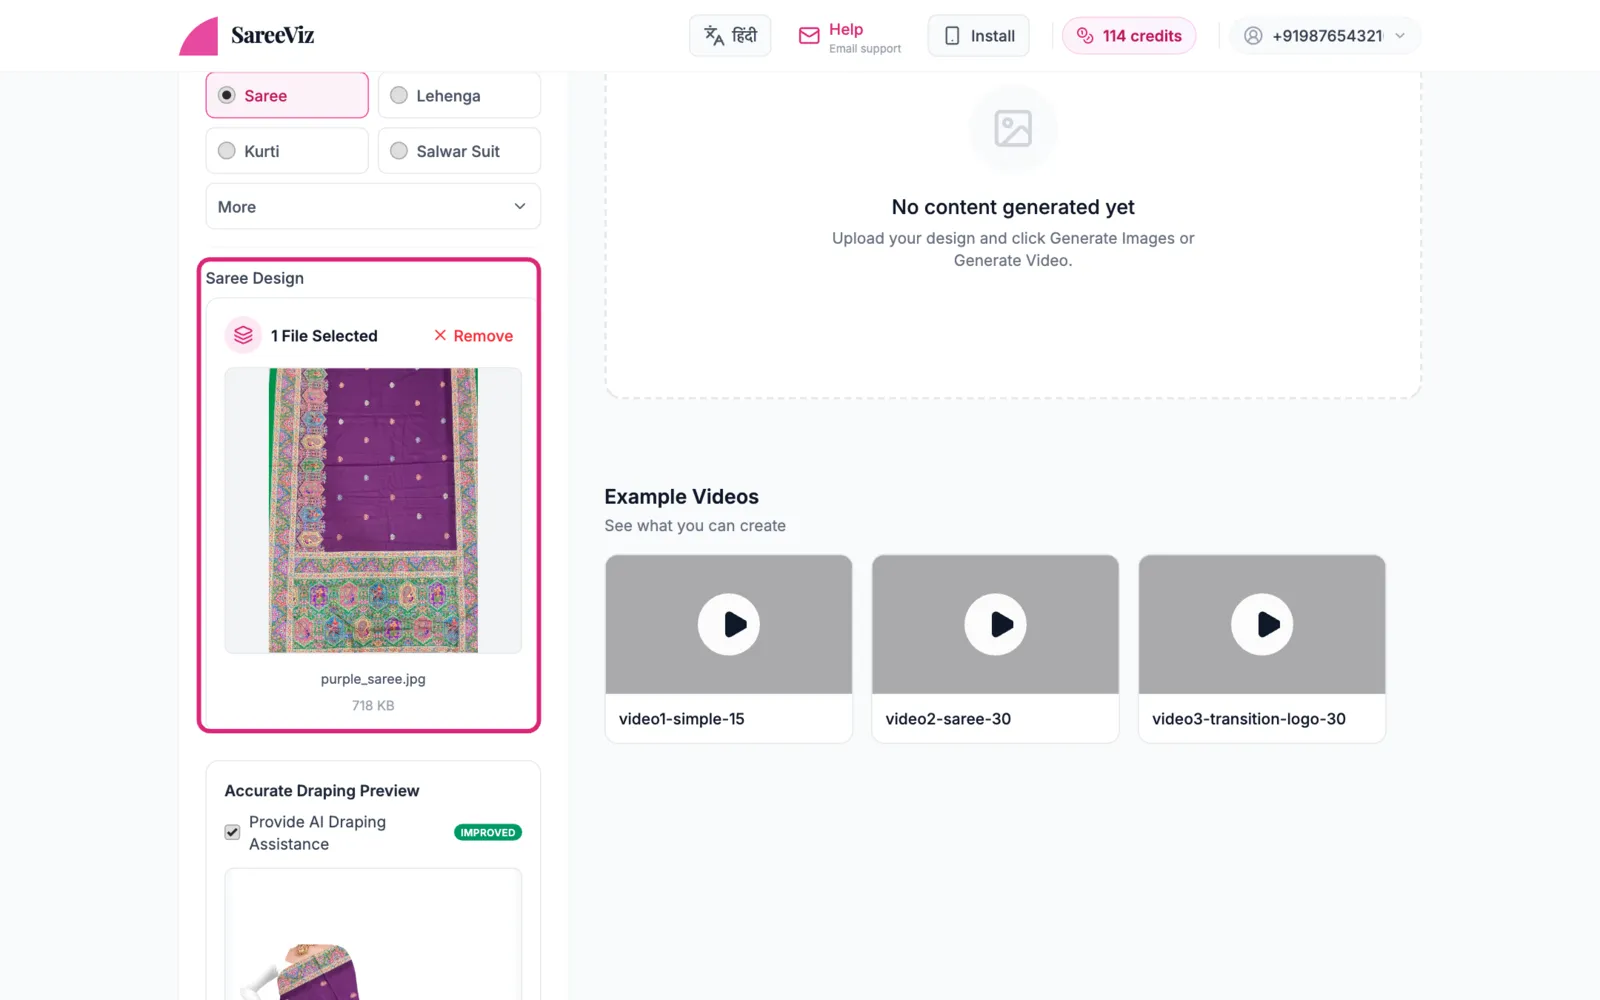
Add part photosoptional
If the blouse, pallu or border has its own design, add a photo of that part in its own slot. Blouse Design sits right below the saree; the pallu is under Add Pallu / Dupatta Design and the border under Add Close-Up / Lace Design.
Most sarees need none or one of these. Skip this step if your saree photo already shows everything.
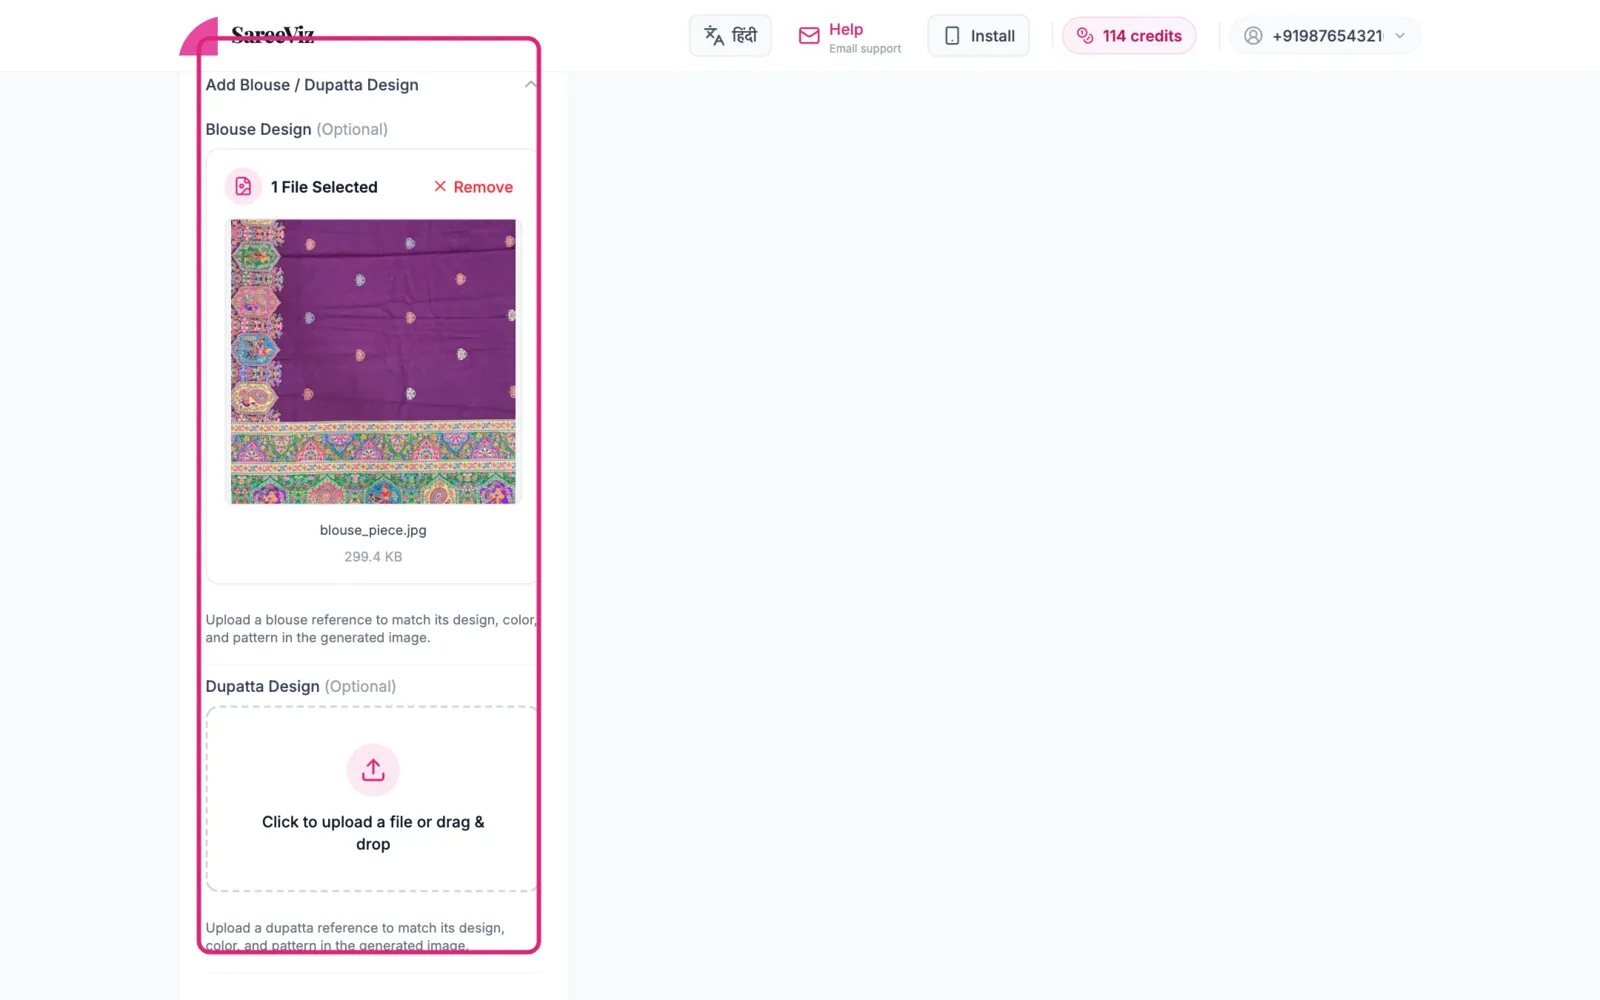
Check the draping preview
When you upload a saree, the Accurate Draping Preview appears, with Provide AI Draping Assistance already ticked. Leave it on. It tells the AI which design goes on which section: the pallu, the pleats, the border.
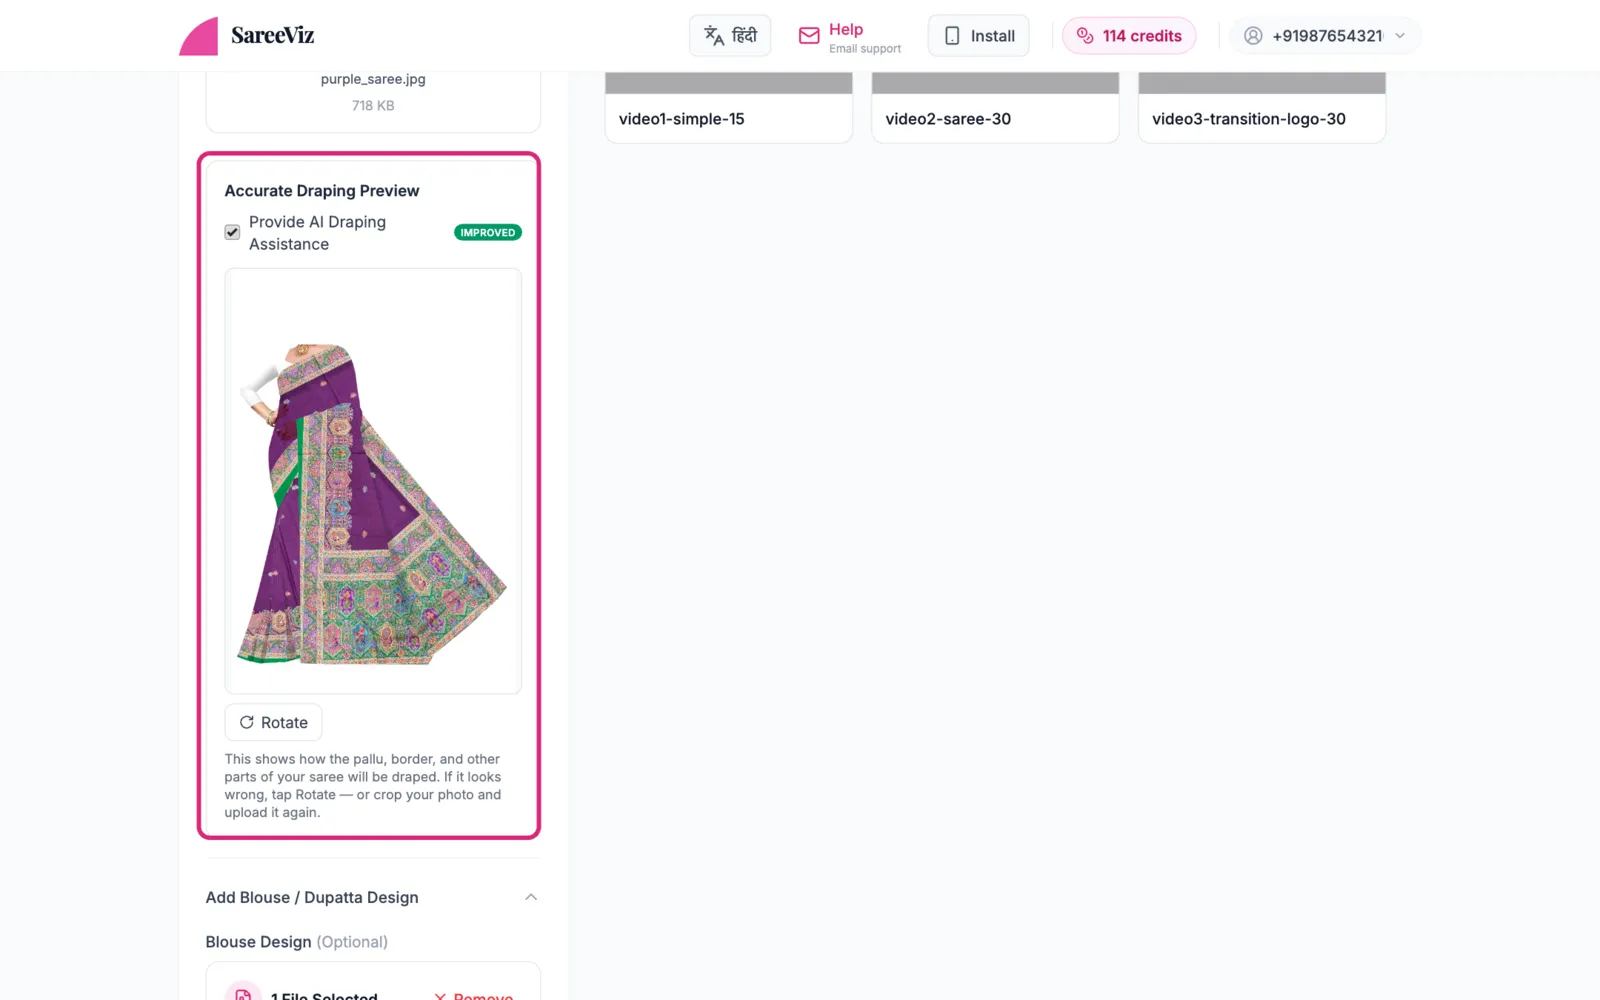
Which section a design lands on is what this preview decides. The drape style itself is a different question, and our comparison of AI saree draping software covers how the tools handle Nivi, Bengali and Gujarati drapes.
Model, background and poseoptional
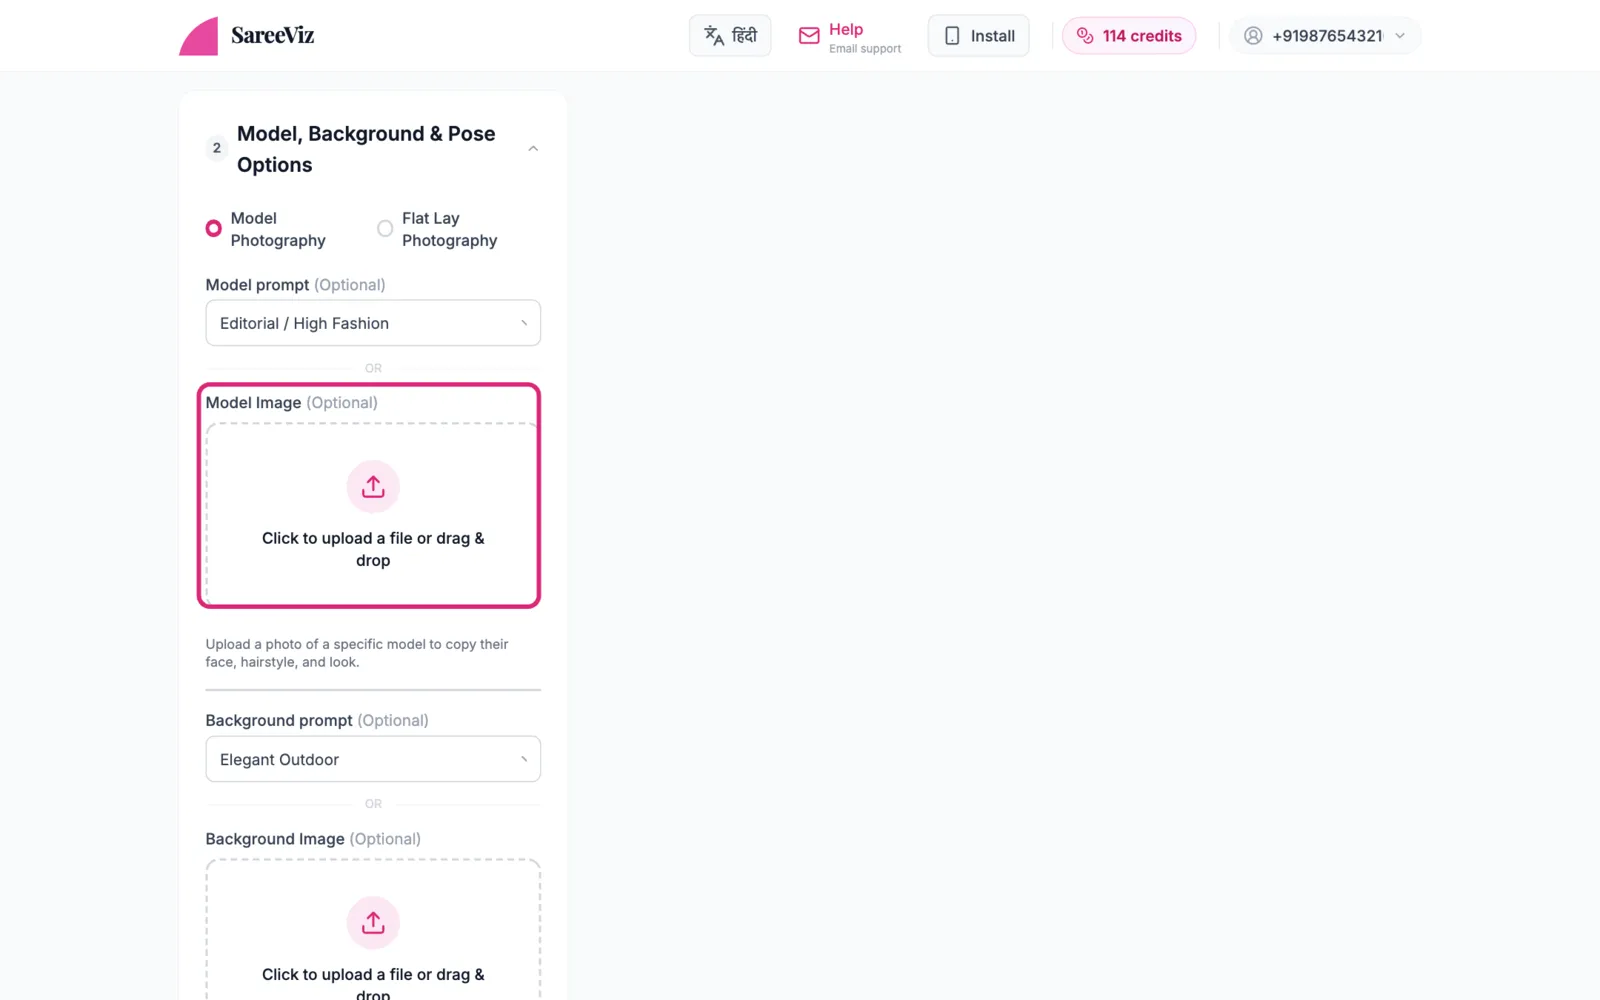
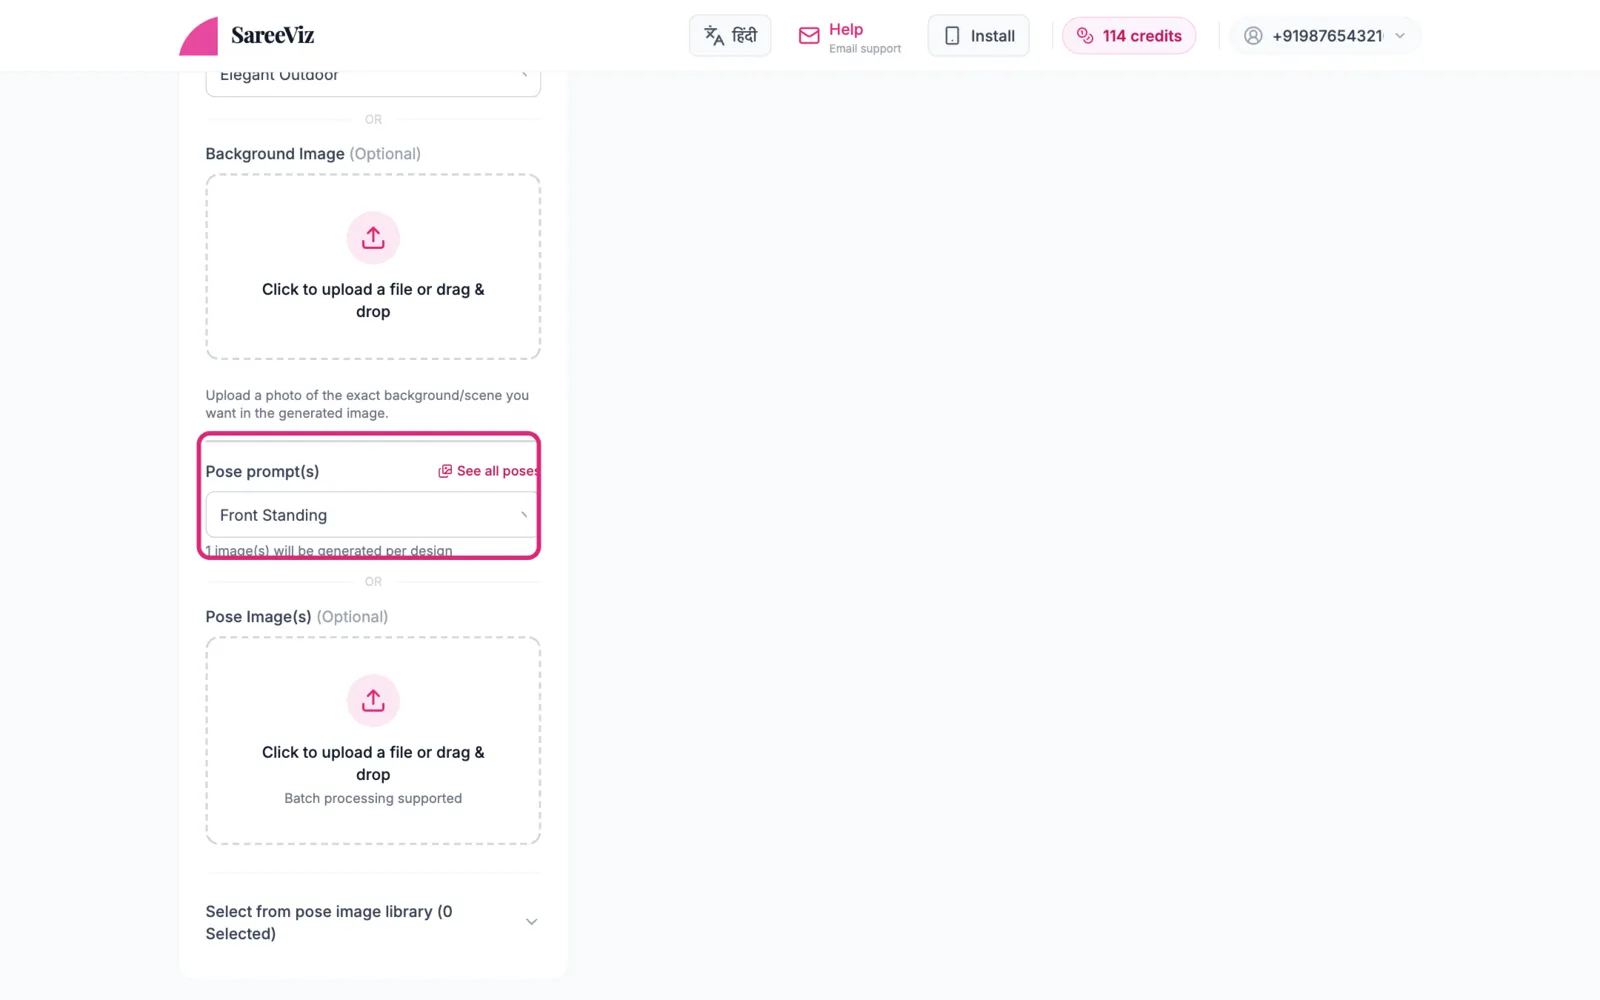
Skip these and you get the defaults: one photo in the Front Standing pose, an Editorial / High Fashion model, and the Elegant Outdoor background (gardens or courtyards in soft natural light). Or take control:
- Model: pick a style from Model prompt, or upload a Model Image to get the same face in every photo
- Background: pick a Background prompt, or upload a Background Image of your shop or set
- Pose prompt(s): up to 10 poses in one run (see every pose), or upload your own Pose Image(s)
Full details: Model, background & pose guide
Pick size and quality
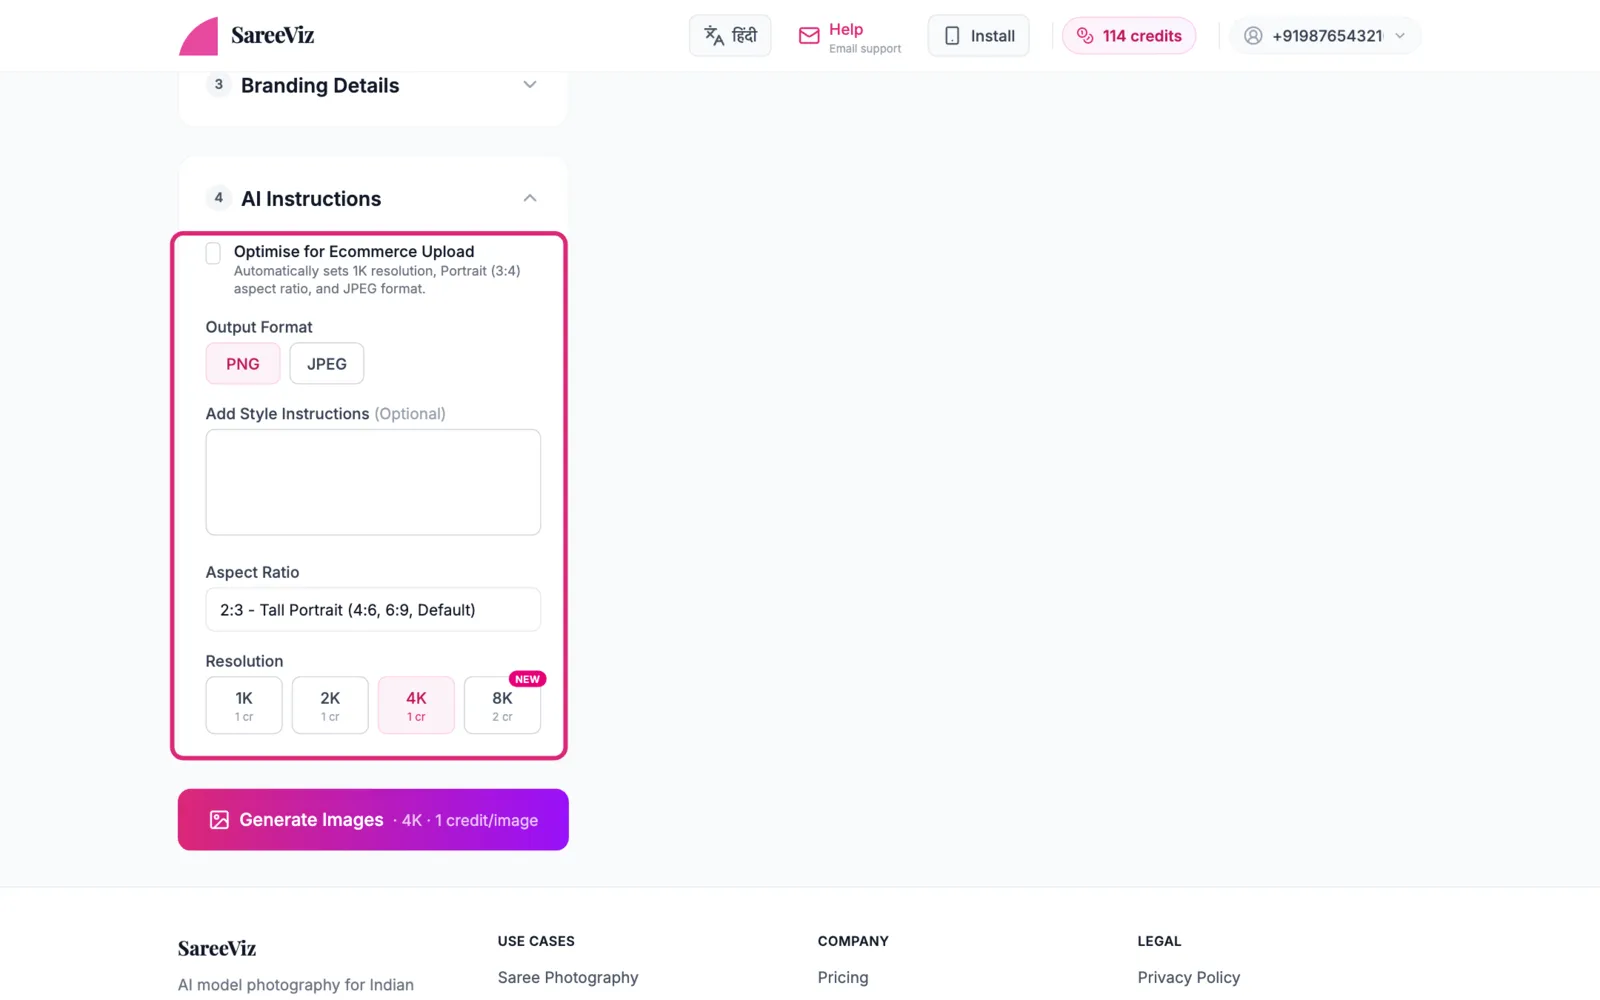
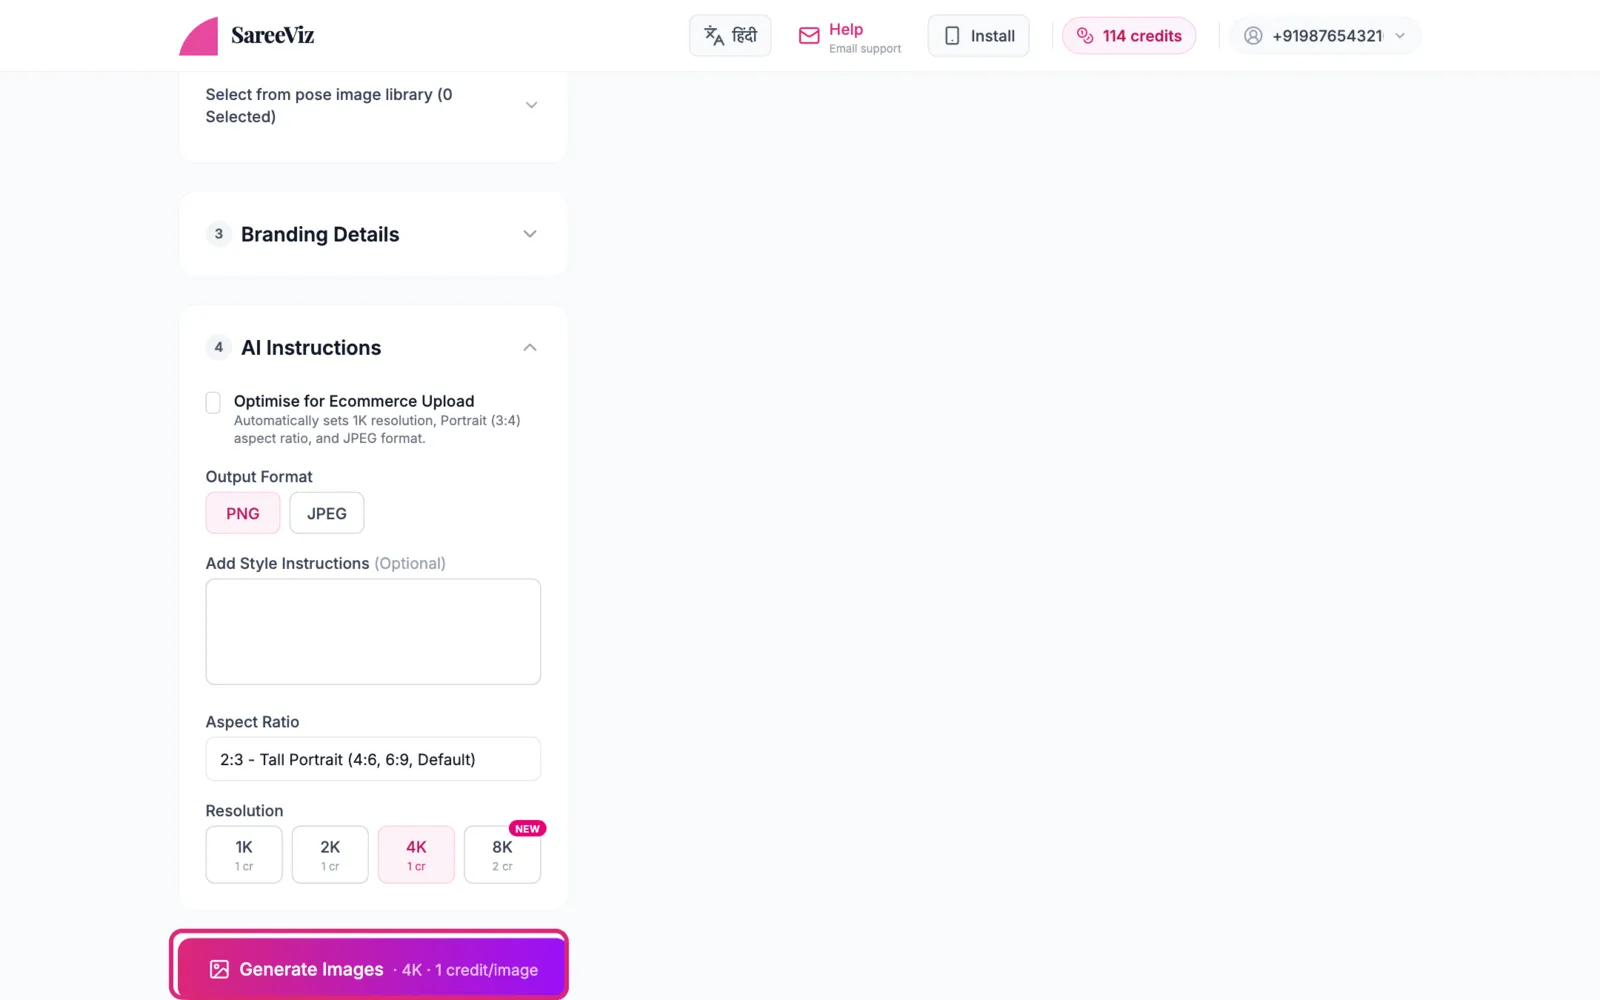
Aspect Ratio sets the shape (9:16 for WhatsApp status, 1:1 for Instagram). Resolution sets sharpness and the price of each photo: 1K is 1 credit, 2K is 1.5, 4K is 2 and 8K is 2.5. The default is 2:3 portrait at 4K, in PNG, so 2 credits a photo. Full details: Settings guide
Generate Images
Tap Generate Images. Your photos are ready in a few minutes. Tap the download button on a photo, or Download All (ZIP) for the whole batch. On an iPhone, the download opens the share sheet, so you can save to Photos or send it to WhatsApp from there. Not happy with one? See Fixing a result.
Three mistakes that ruin saree photos
The blouse photo shows the saree too
The AI copies whatever is in the photo. If your Blouse Design photo includes the saree border, that design lands on the blouse. Crop tight to just the blouse piece. Fix: blouse design appearing on the saree
Uploading every photo you have
Seven photos of the same saree don’t help, because they give the AI seven overlapping instructions. One flat photo, plus only the parts that are different, gives the cleanest result.
Reusing an AI photo as the design photo
For close-ups and crops, always upload your original flat saree photo. Feeding an earlier generated photo back in makes framing and details go wrong.
Your saree type
The recipe above works for every saree. Jump to yours for what is specific to it:
All-over printed saree
The same pattern repeats across the whole fabric. This is the easiest saree to photograph: one flat photo is all the AI needs, because every part of the saree looks the same.
- Upload one tightly-cropped photo in Saree Design
- Leave the part slots (blouse, pallu, lace, close-up) empty unless a part truly has a different design
Don't over-upload
Adding pallu, lace and close-up photos of the same repeating print gives the AI overlapping instructions and can mix sections up. For an all-over print, less is more.
Placement print saree
The design sits in one place, a band, a single motif, or one half, instead of repeating. For placement prints, where the design sits matters as much as what it looks like. The AI learns that from your photo and the draping preview.
- Upload one photo showing the full saree, so the AI sees exactly where the design sits
- Check the draping preview carefully. It decides which section your design lands on
- If the design shows on the wrong side in the preview, tap Rotate
Cropping into the design
If you crop the photo down to just the printed area, the AI can no longer tell where on the saree it belongs, so it may repeat it everywhere. Always show the full saree.
Plain saree
A plain body with no motifs, so colour is everything. With no design to copy, the AI’s whole job is getting your colour and fabric texture right.
- Photograph in natural, even light. Colour casts in your photo become colour casts in the output
- No filters, no beautify mode
- If the weave matters (silk, tissue, crepe), add one macro photo in Close-Up Design
Plain saree with border
A plain body with a decorated border running along the edge. The border is the saree’s identity here, so the AI must reproduce it and place it correctly along the hem and pallu edge.
- Upload a photo of the full saree with the border visible along its length, not just a border close-up
- If the border comes out blurry or generic, add a straight-on photo of just the border in Lace Design
A border photo in the wrong slot
A border strip uploaded as the main Saree Design photo reads as the whole saree, so you may get a border-patterned saree. The main slot gets the full saree; the border strip goes in Lace Design.
Plain saree with designed pallu
A plain or lightly-designed body, with the pallu carrying the main design. This is the type where designs most often end up on the wrong section, so it is worth two minutes of care.
- Upload the full saree in Saree Design, with the pallu clearly visible at one end
- Add a photo of just the pallu in Pallu Design
- Check the draping preview: the pallu design should sit over the shoulder section. Wrong side? Tap Rotate.
The pallu photo shows the blouse piece too
If your pallu photo includes the blouse piece (or vice versa), those designs get mixed. One part per photo, cropped tight.
Expecting the exact pleat-by-pleat drape
The draping preview tells the AI which design belongs to which section. The AI then drapes it naturally on the model, so the fold count and exact pleat positions can differ from the preview. That’s normal.